Git and Github 101

I'm a full-stack developer from Pune, India. I primarily build applications using React, Typescript, and Node.
Outside of development, I spend a lot of time reading and watching cricket!
Entering into the world of coding and technology can be as exciting as nerve-wracking and one of the first things that we come across is source control.
Where do you store the code you write? How do you share that code with everyone? How do you keep track of all the features you are adding? How do you collaborate with someone on a single project?
All of these questions are answered when you start learning source-control or version-control.
One of the most widely used source control tools are a combination of Git and Github.
Git:
Git is software for tracking changes in any set of files, usually used for coordinating work among programmers collaboratively developing source code during software development.
GitHub:
GitHub, Inc. is a provider of Internet hosting for software development and version control using Git.
The very first step to start getting acquainted with Git and Github would be to complete the installations and make your very own Github account.
Cloning a repository -
Cloning is the idea of getting a repository/ project from GitHub into your local computers.
There are two ways to do this:
- You can either download the zip file, which a very a crude method, that I admittedly followed for a very long time.
- Clone it using the tools that Git provides.
Open the folder you would like to clone the repository in. Right click and select git bash here:
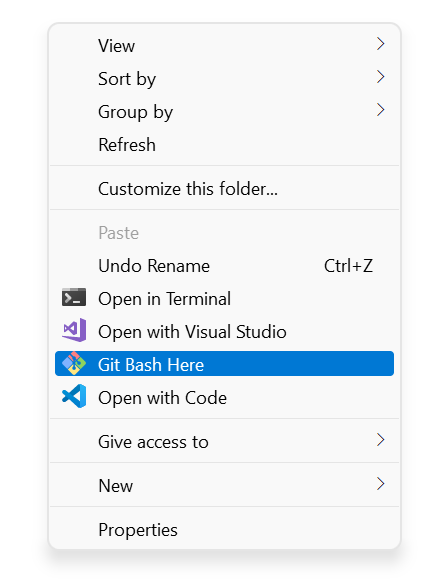
and then type in the command: git clone <repository https link>
As soon as the process finishes, you'll find that the repository is now accessible to you remotely. Open up the Readme file and the instructions will guide you on how to run the app!
Uploading a repository -
Have a project you've been working on and want to share it with the community? Follow the steps to upload your code smoothly -
Step 1: Create a new repository on Github.
Step 2: Initialize your local project, in local, as a git repository. You can use Git Bash to do so or just use the integrated terminal with VSCode.
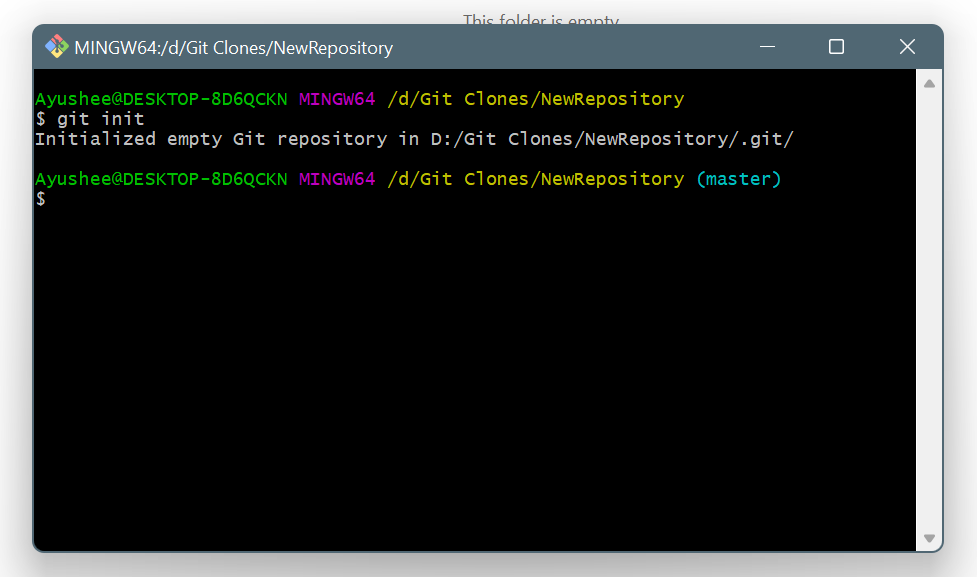
Step 3: Add origin, commit, push.
Adding an origin means you are telling git where to upload your code, i.e. your Github storage unit.
git add origin <repository https link>
Next, you add all the files that are ready to be stored. You can either add all the files together by git add . or type in each file-name as you wish to git add readme.md.
You're now ready to commit the files you've added - git commit -m "Your commit message". Remember, a clear and precise commit message is very important!
Push away to Github! git push origin <branch-name>
Viola! you are now ready to share your code with the world.
P.S. The process of uploading a project has been made simple with the introduction of git cli which, I'll be writing about in my subsequent blogs.
Forking and Branching are two features that are widely used in collaborative events.
Suppose you'd like to contribute to a project and you obviously don't have write access to the code that somebody has uploaded. The way to do that would be to make a copy of this repository in your own Github and work on it in your local. Once you are ready to commit this code - you commit it in your own repository and request the author of the main repository to merge your code changes.
Branching is the process of creating different versions of your project. Adding a new feature in your application? Create a new branch that has all the code of master and add that feature in. When you are ready to go to production with it, merge the code into your master and you're all set!
Git mastery comes with a lot of practice. To know when to pull and when to fetch, when to add and when to push - you only understand with constant practice.
Happy coding!


